Friday, September 29, 2017

Trio of Thanks


For the last Lil' Inker Designs release I made a trio of thank you cards that I have not yet shared.  This card fits me to a "t" unfortunately.  I love to make cards but I am horrible about sending them.  Every year I say I'm going to do better and then I fail.  Can anyone relate? It's frustrating!  So this sentiment was perfect for me, "Thanks, despite how late this card is".

Quick & Easy Thanks Cards

Jen Carter Thanks Late Purple 1

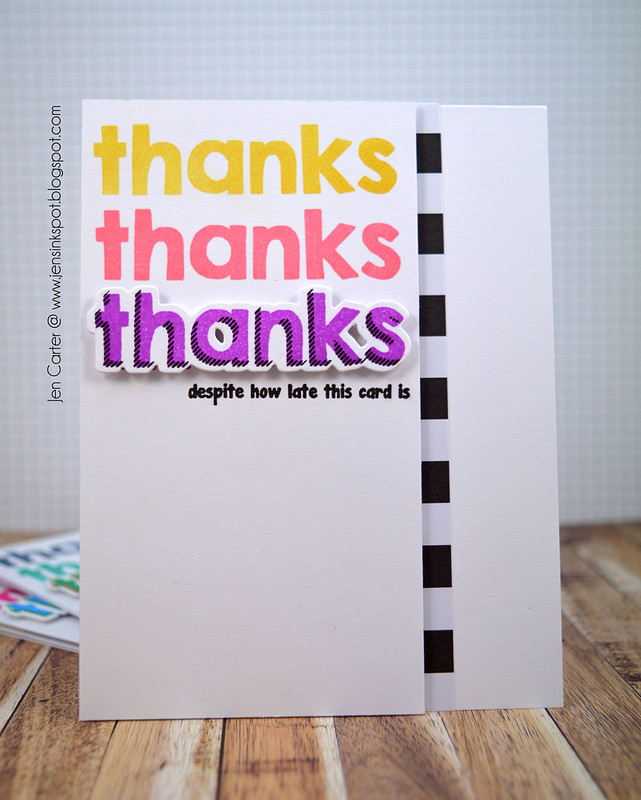
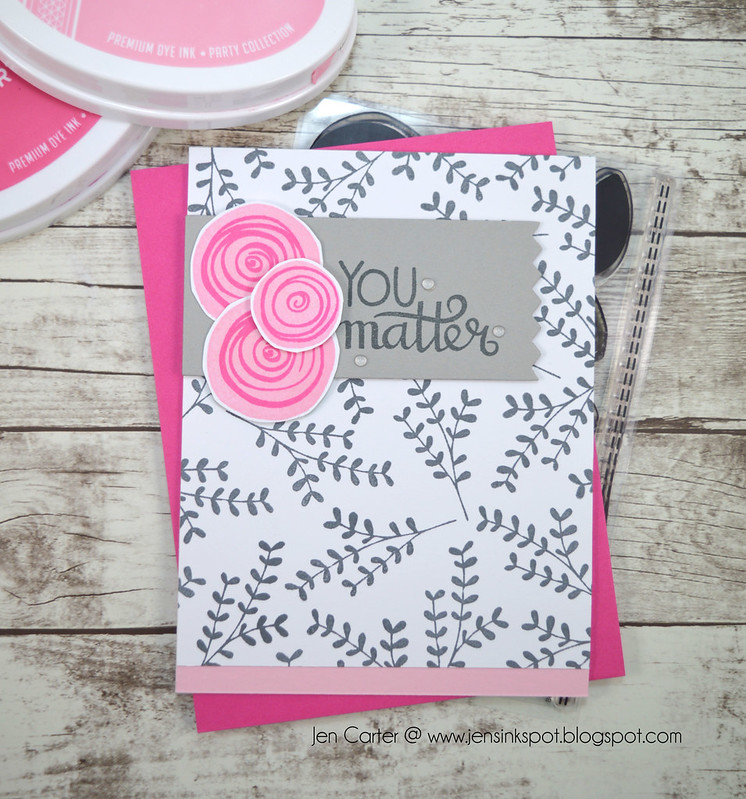
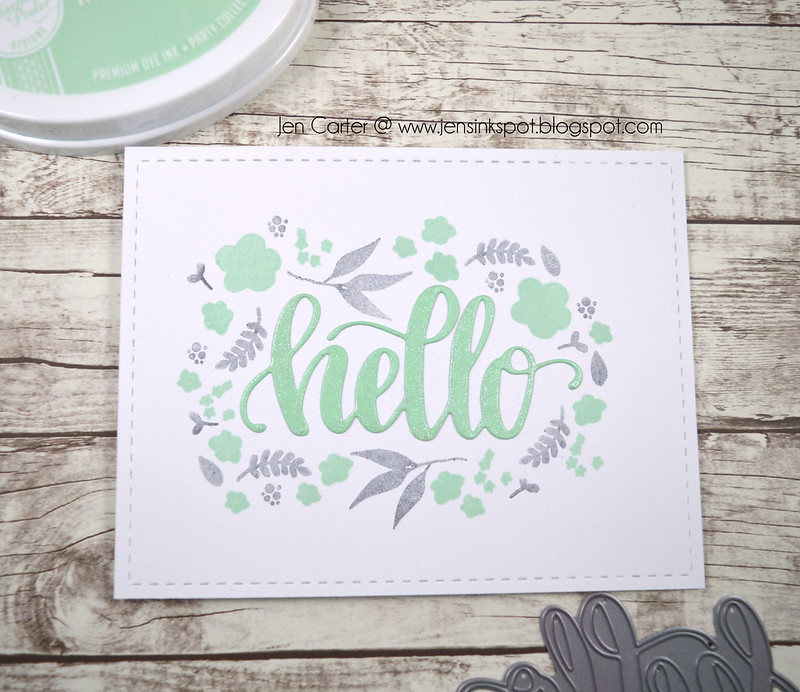
This was the first card I made from the trio.  It's such a simple design.  I stamped the thanks sentiment from the Snarky Shadow Thanks Stamps & Die Set with Fresh Ink Harvest & Melon & Catherine Pooler Flirty Fuchsia.  I die cut the thanks die cut and then stamped the coordinating image & shadow also using the Snarky Shadow Thanks Stamps & Die Set.  

Jen Carter Thanks Late Purple CLoseup

I added a strip of patterned paper down the side.  Also, the purple thanks & the entire panel is adhered with dimensional tape.

Jen Carter Thanks Late Rainbow

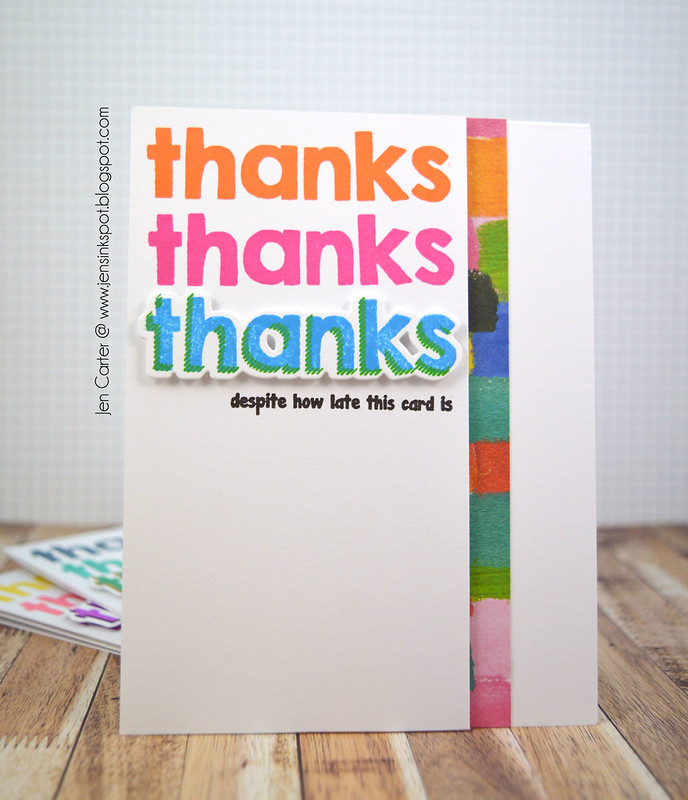
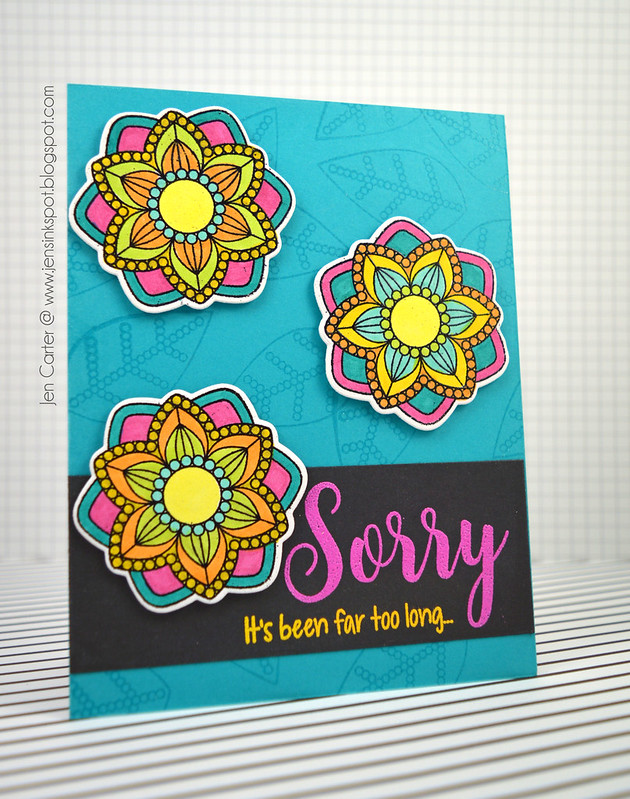
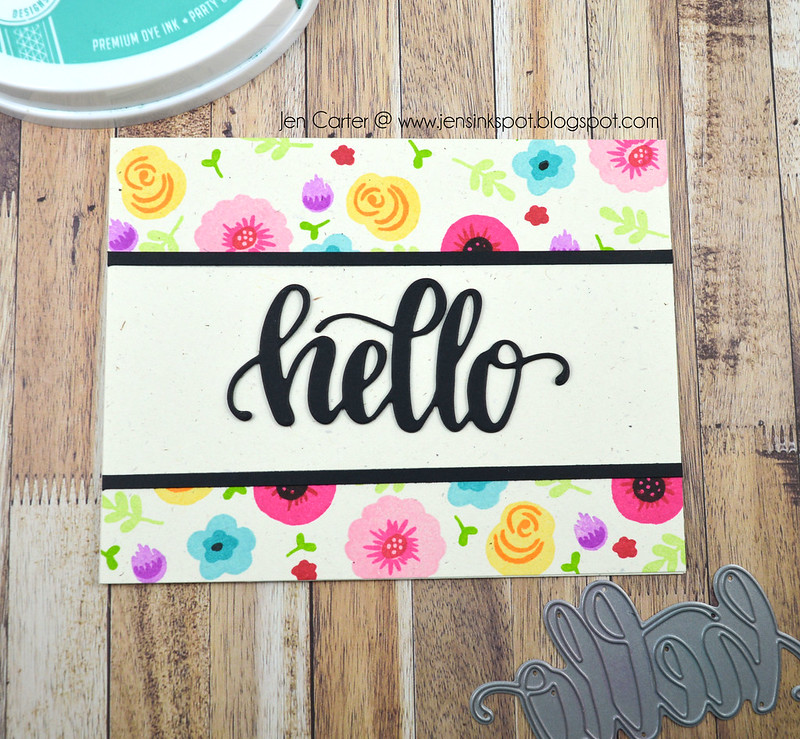
Here's version two of this card.  Ink colors are Orange Twist, Party DressFiesta Blue & Grass Skirt.

Jen Carter Thanks Late Rainbow Closeup

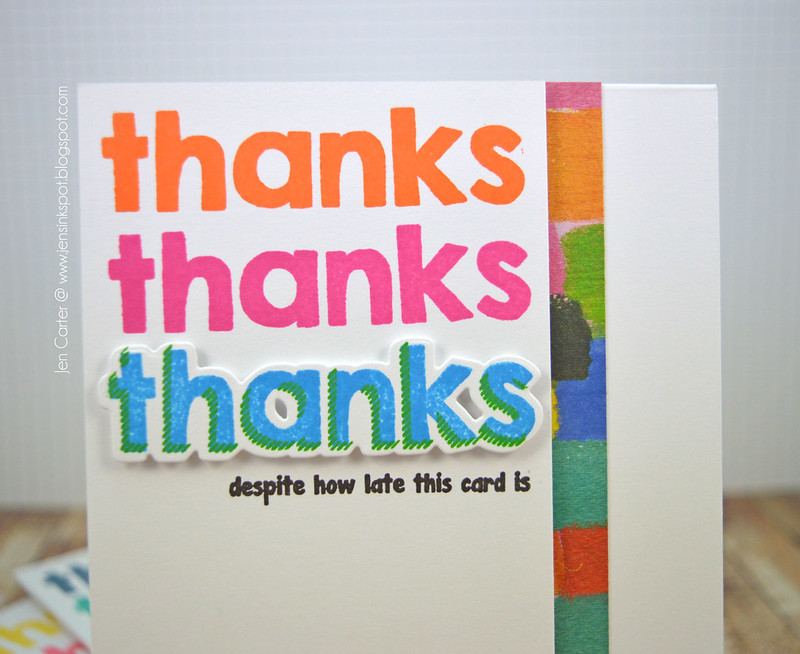
The patterned paper is from Bella Blvd Make Your Mark.

Jen Carter Thanks Late Green 2

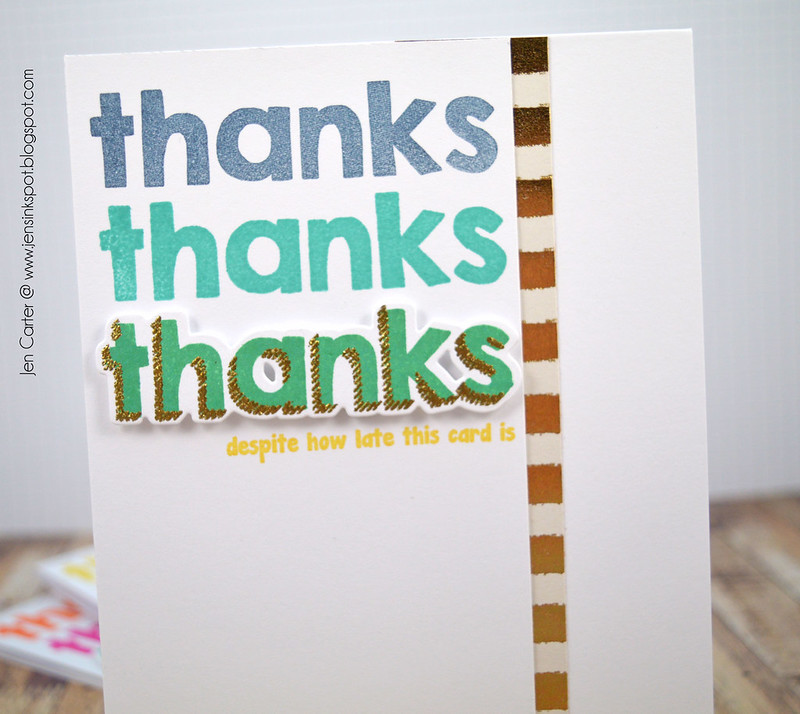
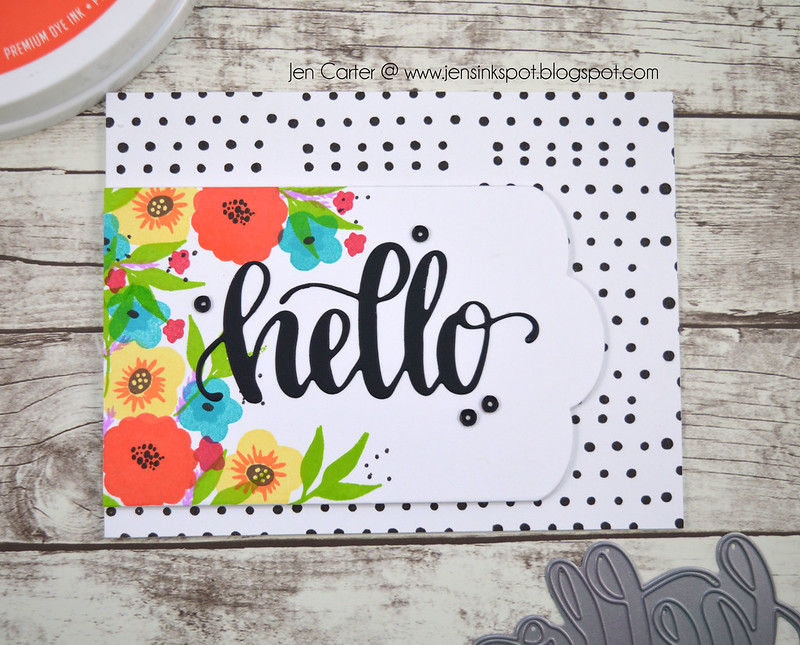
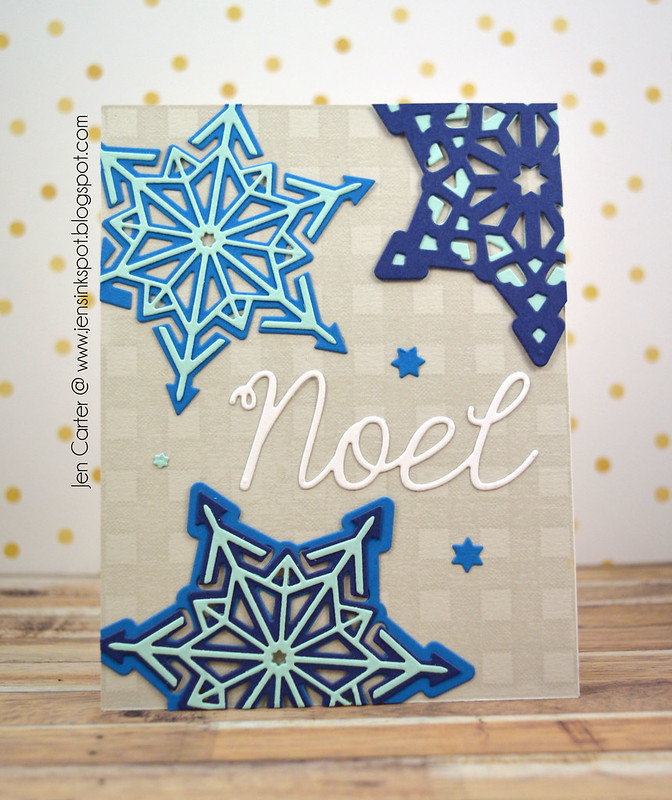
And this last one has a color combination of Fresh Ink Navy, CP Aquatini & Distress Oxide Lucky Clover

Jen Carter Thanks Late Green Closeup

Thank you for stopping by today!  I hope you have a fantastic day!

Wednesday, September 27, 2017

You Matter


Jen Carter CP You Matter Best in You 3

For this card I wanted something soft.  I used a leaf image from Catherine Pooler's Lovely Flowers stamp set to create this background with Black Jack ink.  The sentiment is also stamped with Black Jack ink and it is from a set that was in the last SOA box (sold individually in a few months) called Bloomin' Bouquet Stamps.  I added a tiny strip of pink cardstock to the bottom of the panel.


I stamped the flowers with the new Best in You stamp set using It's a Girl & Party Dress inks.  I hand cut the flowers and adhered them to the panel.  The gray tag was die cut with Lil' Inker Designs Pinking Edge Sentiment Flags die set. I added a few rainstones to finish the card off.

Thanks for stopping by!

Monday, September 25, 2017

It's Been Far Too Long...


Bye, Bye Summer...Hello Fall
It appears we have finally made it to Fall weather after a very hot week last week.  I wanted to share one last Summery card before moving into the holidays.  

Jen Carter Sorry Grateful Florals 1

For this card I started by stamping the leaf background with VersaMark ink all over the blue card base using a stamp from the lovely Grateful Florals stamp set.  I then die cut the flowers with the Grateful Florals Outlines Dies and stamped & then embossed the images with black embossing powder. I colored with copic markers.  I also embossed the sentiment from the Sorry stamp set.  I love that large sorry!

Thank you for visiting! I hope you have a wonderful day!

Friday, September 22, 2017

Fall Greetings


Last night I was in the mood to create a Fall card.  I'm not sure why because it is HOT here in Kansas this week (mid 90's!). I started looking through my supplies and ended up pulling out the new Tilly's Magic Garden from Catherine Pooler.  

Jen Carter CP Hello Magic Garden Fall

I die cut the tag from a die set called Lovely Flowers & Banners Dies.  I love the size & shape of that tag (not to mention all of the other fun accessories in the die set).  I then took out the vibrant inks (have you checked these out yet because if not, you won't be disappointed!!) Tiara, Orange Twist, Tutti Frutti, Rockin' Red, Lime Rickey, Fiesta Blue, All That Jazz (coming soon), Pixie Dust & Icing on the Cake.  I stamped the flowers with the Tilly's Magic Garden stamp set.  I die cut the gorgeous Hello Die from Catherine's new Midnight Black cardstock and then added some black sequins from Pretty Pink Posh.  For the dotted background, I used a stamp block from the Lovely Flowers Stamp Set and stamped it several times in a row which was quick and easy to do.

I think I created a fall-like card as a way to celebrate a cooler forecast for next week! :)

Thank you for visiting today!  I hope you have a fabulous weekend!


Thursday, September 21, 2017

Too Cute to Spook


A Haunting We Will Go
The newest Lil' Inker Designs release included an adorable stamp set with animals dressed up in costumes.  Seriously. Cute.

Jen Carter A Haunting Go Too Cute 1

To make this card I started by stamping the Trick or Treat sentiment from the A Haunting We Will Go stamp set over and over on the purple cardstock.  I then die cut a window using one of the Stitched Mats: Dual Stitched Square Dies.  I love that this leaves stitches around the window. Behind the window I backed it with striped pattern paper.  Next I cut the Spiderweb Greeting Die from white glitter paper and layered it on top.  I die cut the animals with the A Haunting We Will Go die set, stamped them and then colored them with copics.  I adhered them with dimensional tape to the window.  Last, I stamped the sentiment on a small white piece of carstock, also from the A Haunting We Will Go stamp setand adhered with dimensional tape.

Thank you for stopping by today!

Wednesday, September 20, 2017

Layered Snowflakes


Snowflake Layering Dies
The September Frantic Stamper release includes the coolest snowflake dies.  They are designed to work by themselves or you can stack them on top of each other for several different results. You can see the dies here: Chamonix Snowflakes, Luchon Snowflake & Courchevel Snowflake.

Jen Carter Layered Noel Snowflakes 2

For this card I started with the background by stamping the Gingham Background Stamp with Versamark ink onto the gray card base.  Then I chose three colors of blue cardstock and cut each snowflake with different colors and started layering them together.  I die cut the beautiful Layering Noel and used one of the three cuts that the die set makes.  I used a few of the star snowflakes from the center of the snowflakes as accent pieces.

Thank you for visiting my blog today!

Monday, September 18, 2017

Another Hello


Mint & Gray Hello
I love the newest stamp set from Catherine Pooler called Tilly's Magic Garden.  I wanted to use the stamps in a different way than I did before (see this post here if you are wondering which card I'm referring to).  I found this set to be very versatile to play with!

Jen Carter Tilly's Magic Hello CP Gray Mint

One of my favorite Catherine Pooler ink colors is Mint to Be and for this card I wanted to make that color the star. I started by die cutting the gorgeous hand lettered Hello Die and using it as a placement for the stamps.  Using several of the stamps in the Tilly's Magic Garden Stamp Set I started stamping in Mint to Be & also with Black Jack ink that I first stamped off once and then stamped on the cardstock. It made a gorgeous light gray!  I didn't want to stamp too many images, so I had to be careful to get just the right balance between the mint & gray color placements.  After I finished that I used a Nuvo Aqua Shimmer pen to add glitter to the top of the hello die cut and then adhered it to my card.  

I am entering this in the Cupcake Inspirations Challenge to use florals on your card.


I'm also entering this card in the SSS Wednesday Challenge, Clean & Simple.

Thanks for stopping by!  You can see all of the new items released at Catherine's store by clicking here!

Thursday, September 14, 2017

New Release at Catherine Pooler Designs

New Release at Catherine Pooler Designs


It's release time at Catherine Pooler Designs and I have a card to share with you using a new stamp set & die!  Along with this there are several other things releasing that I want to tell you about, so be sure to check it out at the bottom of this post (pssssttt...there's new cardstock!)!

A Floral Hello

Jen Carter CP Tilly's Magic Garden Hello 1

I really enjoyed playing with the new Catherine Pooler stamp set released today called Tilly's Magic Garden Stamp Set.  There are so many possibilities on how to stamp these flowers!  I loved playing with the possibilities!  And isn't that new Hello Word Die gorgeous? I'm a fan!  

I used lots of Catherine Pooler ink colors on this card including: It's a Girl, Party Dress, Rockin' Red, Tiki Torch, Tiara, Garden Party, Lime Rickey, It's a Boy, Fiesta Blue, Pixie Dust & Flirty Fuchsia.  These are seriously and honestly my absolute favorite inks.  I know I've said it before but I love how vibrant they are and how easy they stamp! They are dye inks so they dry super fast too!  For the black stripes I used another new item coming to Catherine's Store and it is Midnight Cardstock!   Yippee!!  There are four new colors of cardstock releasing today!  Midnight is a nice, dark black and has a wonderful thickness to it too!

Release Items
Today's release include lots of fun new products!  
  • The NEW Craft Room Essentials Section of the Shop: Catherine Pooler is launching some "must-have" products in the store like Whipped Spackle, Glass Bead Glitter Gel, Texture Luxe, her favorite (and cheap!) pallette knife, sequins, adhesive, scissors, Quick Stik, Ranger Mister....and.....3 packs of cardstock: Chocolate (to go with Icing on the Cake Ink - get it?) , Smoke and Mirrors (2 shades of grey), and Midnight. You can find these new products in this section in the shop.
And while you are taking a look, can I entice you to also check out the new grid blocks that were recently released exclusive to her store?  They are AWESOME! Easy to hold, they have grips, are lightweight, won't hurt your hands and they have etched grid lines too!


Thank you for visiting today!  I hope you'll enjoy this new release!

Tuesday, September 12, 2017

Lil' Inker Designs September Release Day 3

Welcome back to the last day of the Lil' Inker Designs September release!  If you are following along in the blog hop you should have come from Heather Hoffman's Blog All of the products are currently available in the Lil' Inker Designs store, so you can start shopping now! :)  


Eat Pie
My last 2 cards for this release uses a stamp set that makes me chuckle called Eat Pie.  It reminds me of Chick-fil-a's popular campaign with the cows wearing signs trying to guide people to eat chicken...not cows. 😁

**And be sure to scroll down because my 9 year old daughter is joining me for this post with her card made from this set too!**


Photo Source & More Pictures


Stamping the turkey in this set was a lot of fun.  You may think that I just used random colors but I was actually really inspired by a gorgeous real life breed of turkey shown above.

Jen Carter Eat Pie 4 wm

To assemble the turkey, I first die cut her using the Eat Pie dies.  I then stamped each piece of the turkey with the Eat Pie Stamp set with bright inks (listed below), trying to use the colors in the turkey above.  I die cut the sign, pumpkin & squirrel and stamped them with the same set.  The background was die cut with Cover Up Die: Stitched Clouds.  And the hill was created using one of the dies from Dual Dotted Border Builder Dies.

Introducing Sadie's (9 Years Old) Eat Pie Card
When I was making my card, my 9 year old daughter Sadie saw the set and wanted to make a card too.  I have to say she did a wonderful job!  I'm so proud of her!


Here she is with her card.

Jen Sadie Carter Eat Pie 22

For her card she also wanted to use bright colors but on a brown turkey (inks listed below).  She die cut the turkey, sign & pumpkins with the Eat Pie dies and then stamped the individual pieces with the coordinating Eat Pie Stamp set.  She cut the sign down so that it looked like he was picketing to eat pie, not turkey.  The hill was die cut with one of the Border Builder dies.  She die cut the Sunshine (large) and then stamped a face & mustache from the So Prickly stamp set (totally her idea!).

Didn't she do a great job?  I loved listening to her thought process as she thought out each detail!  I know she'd love reading your comments for her card (if you are inclined to leave one)!

New Products Used

 Eat Pie Stamp set

Other Products Used


 Cover Up Die: Stitched Clouds
 Sunshine (large)

So Prickly stamp set

Comment to Win!
Be sure to comment on all of the Design Team blogs so you are eligible to win a BIG prize from Lil' Inker Designs this month!


Thank you for joining me this week for the newest Lil' Inker Designs release!

Supplies (not listed above)
Supplies for Eat Turkey #1 
Cardstock: Aqua Mist (PTI)

Supplies for Eat Turkey #2 
Cardstock: Harvest Gold (PTI), Michaels (blue)

Monday, September 11, 2017

Lil' Inker Designs September Release: Day 2


Welcome to day 2 of the Lil' Inker Designs Release!  All of the products being shown today are currently available in the Lil' Inker Designs store!  If you are following along in the blog hop you should have come from Heather Hoffman's blog.

Today I have 2 Halloween themed cards to share using the new A Haunting We Will Go StampsA Haunting We Will Go Dies, Ghost Shaker Die Set, You've Been BOOed Stamps & Dies BundleCover Up Die: Stitched Harlequin & FaBooLous Stamp Set.

Trick or Treat with Frankenlion
The new set A Haunting We Will Go has the cutest little animals all dressed up for Halloween.

Jen Carter Hautning Frankenstine Harlequin 1 wm

I die cut the new Cover Up Die: Stitched Harlequin on purple cardstock and then used the On the Diagonal die to create a stitched angle.  On top of that I took a piece of black & white dotted paper and swiped Twisted Citron & Wilted Violet Distress Oxide Inks over the top.  I stamped the Trick or Treat sentiment from the FaBooLous Stamp Set.  I die cut Frankenlion from the A Haunting We Will Go Dies and then stamped the coordinating image from the A Haunting We Will Go Stamp Set.  The image was colored with copics and then I used Crushed Grape Nuvo Drops on the nose & tail for some dimension and shine.

BOO Shaker
The new Ghost Shaker Die Set makes making Halloween shaker cards a breeze.

Jen Carter You've Been Boo'd Ghost Shaker 1 wm

I started by die cutting the BOO with the You've Been BOOed Stamps & Dies Bundle.  I stamped the coordinating letters in Flirty Fuchsia, Orange Twist & black Inks.  For the shaker I cut the background ghost from glitter white cardstock using the Ghost Shaker Die Set and then cut the black outline with black glitter cardstock.  I attached a couple of Eye Enamel Dots on top of the shaker.  This is all adhered onto layers that have been die cut using the Stitched Mats: Rectangles die set.  

New Products Used


Previously Released Items Used


To see all of the new release products, click HERE.

Comment to Win
Be sure to leave a comment on each designer's blog to be eligible to win the big prize from Lil' Inker Designs this month!


Thanks for visiting my blog today!  All of the Lil' Inker products that I've used (and more!) are available to purchase right now in the Lil' Inker Designs store!  Your next stop on the blog hop is over to Jessica Frost-Ballas' Blog
Related Posts Plugin for WordPress, Blogger...